
Setting up your screens: Windows + P and matching your display layout
If you're working at a desk with a dock and one or more monitors, this guide will help you get your screens working the way you want. It covers choosing how your screens are used, arranging them to match your desk, and picking your main display.
TABLE OF CONTENTS
- Before you start: connecting to a new dock
- Choosing how your screens work (Windows + P)
- Matching the layout to your desk
- Setting your main display
- Using the right USB-C port
Before you start: connecting to a new dock
The first time your laptop connects to a dock, Windows needs to set up drivers, detect your monitors and connect to the network. This can take a minute or two, and your screens may flicker or go black while it happens.
- Plug your laptop into the dock and wait for your screens to settle.
- Avoid unplugging while it's setting up, as this makes Windows start the process again.
- Once it's done, future connections to the same dock should be much quicker.
Choosing how your screens work (Windows + P)
- Press the Windows key and P at the same time.
- A menu will appear on the right-hand side of your screen with four options:
- PC screen only: shows everything on your laptop screen only.
- Duplicate: shows the same picture on every screen. Handy for presenting in a meeting room.
- Extend: turns your screens into one big workspace so you can drag windows between them. This is the best option for most desks.
- Second screen only: turns off your laptop screen and uses your monitor only.
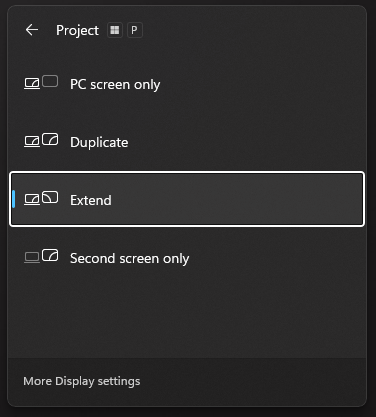
- Click the option you want. Your screens will adjust within a few seconds.
Tip: If your monitor is just showing a copy of your laptop screen, press Windows + P and choose Extend.
Matching the layout to your desk
If your mouse moves off the wrong side of the screen, Windows doesn't know where your screens sit on your desk. You can fix this in a few steps.
- Open Display settings (press Windows + P, then click More display settings).
- At the top of the page, you'll see a numbered box for each screen. Click Identify to show a large number on each physical screen so you know which is which.
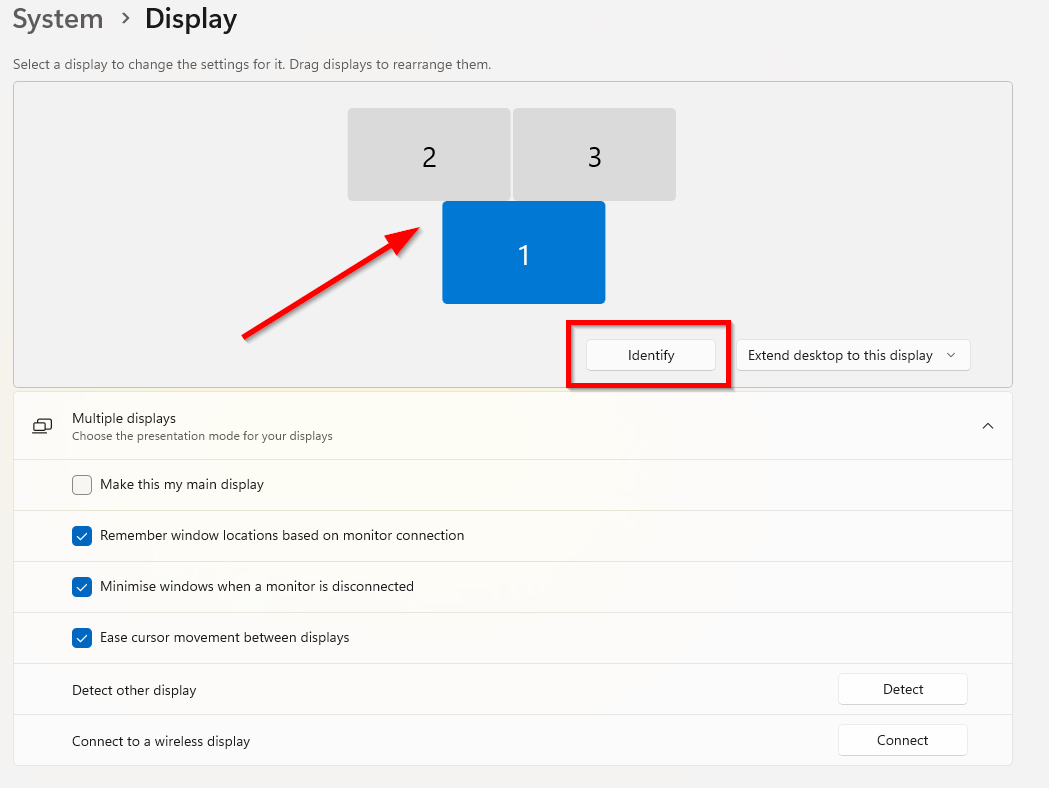
- Drag the numbered boxes so they match where your screens sit on your desk. For example, if your laptop is below your external monitor, place its box below, as shown in the screenshot above.
- Line up the edges of the boxes roughly where your screens actually meet, so your mouse moves smoothly between them.
- Click Apply if prompted.
Setting your main display
Your main display is where your taskbar icons, Start menu, notifications and new windows appear by default.
- Open Display settings (press Windows + P, then click More display settings).
- Click the box for the screen you want to use as your main display.
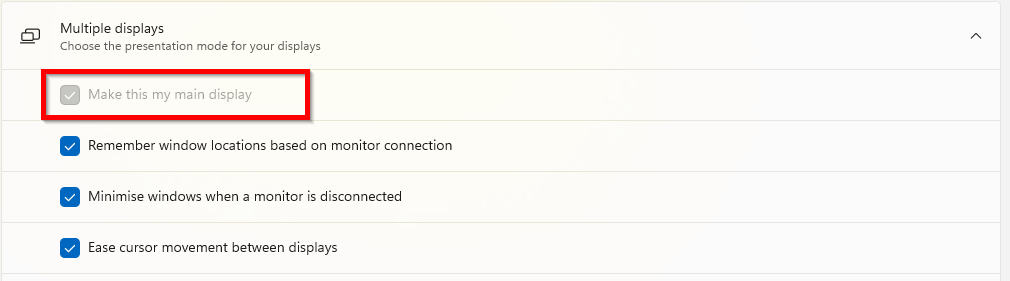
- Scroll down and expand Multiple displays.
- Tick Make this my main display.
Tip: Windows will remember this layout for this dock, so you shouldn't need to set it up again next time.
Using the right USB-C port
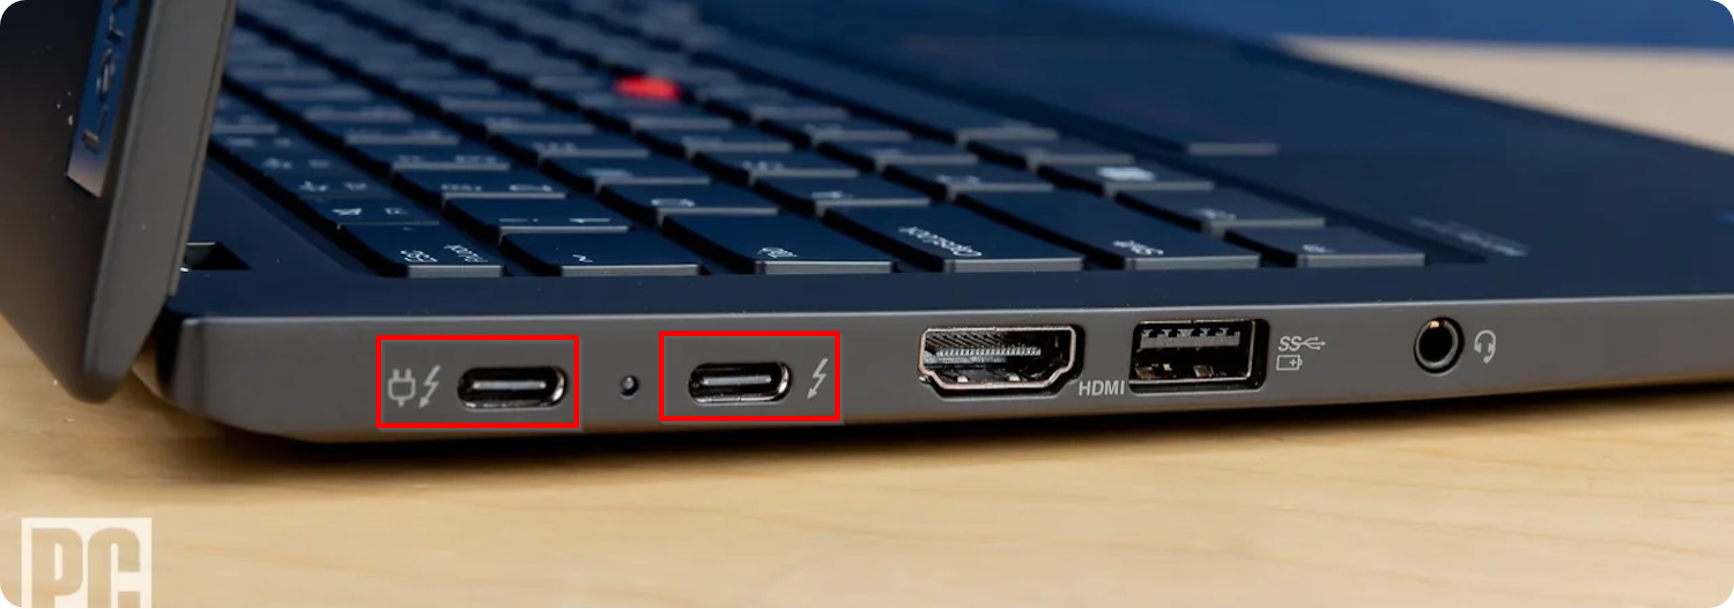
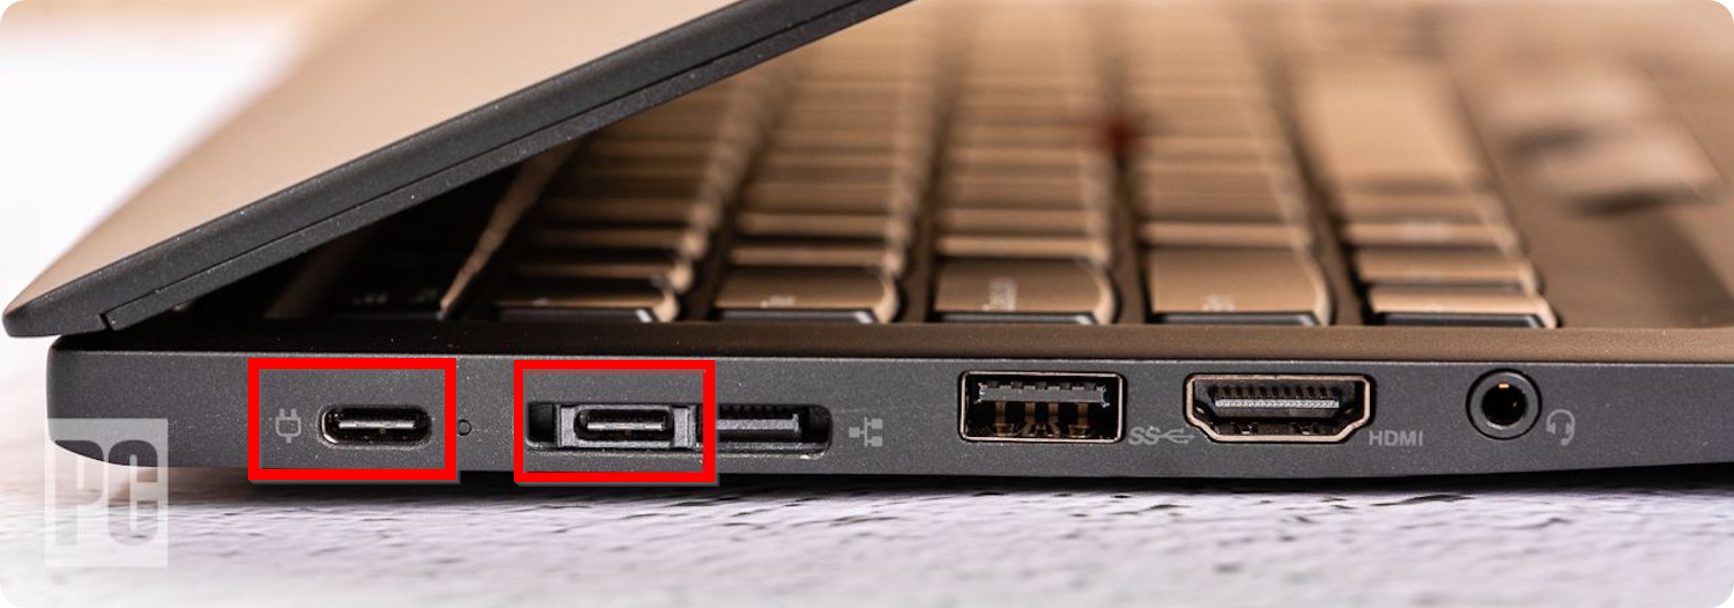
Your laptop has two USB-C ports, and either one can be used to connect to a dock. Over time one port can become worn, which can cause your screens to flicker, drop out or not be detected at all. If this happens, try the other port.
- Unplug the dock cable from your laptop.
- Plug it into the other USB-C port.
- Wait for your screens to settle. This may take a minute the first time.
- Stick with whichever port gives you the most reliable connection.
Tip: If neither port works reliably, log a ticket with IT so we can check the laptop and dock.
Still having trouble?
Log a ticket with IT and let us know which desk or site you're at, and what you've already tried.