
SALESFORCE ADD-IN – CREATE A CONTACT
For those that are emailing us who don't have a record with us in Salesforce, there is the option to create a record from their email directly via the Outlook SF add-in. There are two ways/modes of doing so, and this is due to Salesforce's automated function of showing you either method. Salesforce will offer either mode/view according to its “intelligence” algorithm when the email is in focus. Some users might prefer either view, however the option to turn off “Log Emails Faster” is available to users who are provided mode 2 as opposed to mode 1.
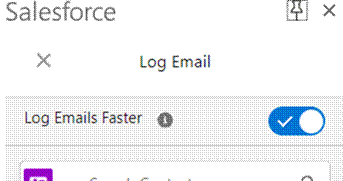
MODE 1.
Enabled through toggling the 'Log Emails Faster' option at the very top of the plugin pane. Quicker.
MODE 2.
Enabled through disabling the 'Log Emails Faster' option at the very top of the plugin pane. Slower, due to having an additional step.
In any case, either method is valid. It's entirely up to you, the user, as how you'd like to approach this and how it'd best integrate into your workflow.
MODE 1. This is the quickest way:
First of all: Look up the name/organization who is emailing you in Salesforce, to ensure that a duplicate is not being created. If everything looks fine, feel free to commence creation of the record.
With your email of choice open, click on the add-in in the menu bar – usually towards the top right.

1.
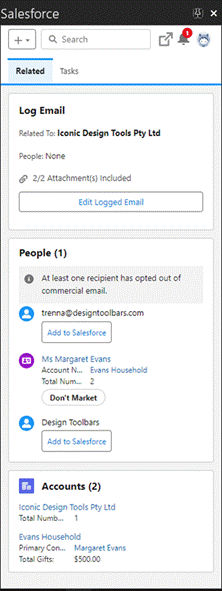
When opening the add-in on Outlook, either on the App or through a browser, a pane to the utmost right will come up. This is how it will appear.
2.
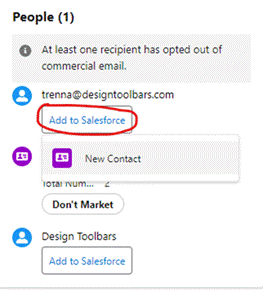
After that, an option to 'Add to Salesforce' for the contact will appear on the pane. Click on this.
3.
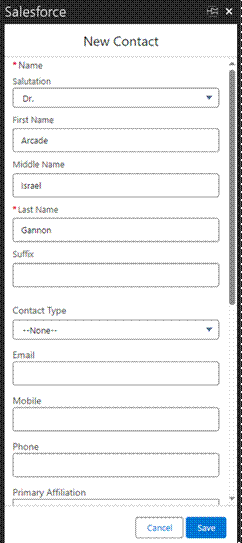
Upon clicking the 'Add to Salesforce' button, the pane will change its view to adding the 'New Contact'. Some areas of the form will be pre-filled according to the sender's email, as well as the name attached.
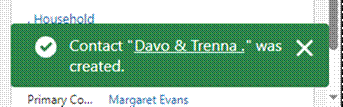
After doing so, press 'save', and the contact will be created on Salesforce (it's always good to check on Salesforce itself, to ensure that this has been successful). This prompt will confirm.
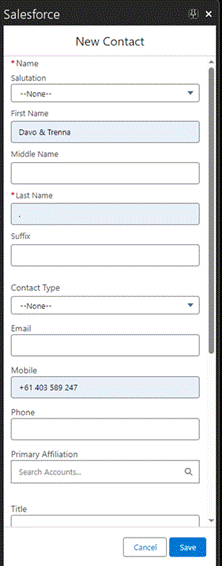
Minimum requirement: if you know the postal address, please add this in. It's a necessary requirement – any way to contact our supporters is always of utmost importance.
Remember: Add as much information as possible, i.e., name, address, and email (of course). The more data we have, the better.
MODE 2. This way is a bit longer
First of all: Look up the name/organization who is emailing you on salesforce, to ensure that duplicates are not being made. If everything looks fine, feel free to commence creation of the record.
With your email of choice open, click on me. You'll find me at top right.

1.
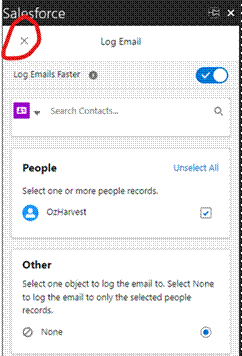
When opening the plug-in on Outlook, either on the App or through a browser of your choice, select the left-most cross on the pane.
2.
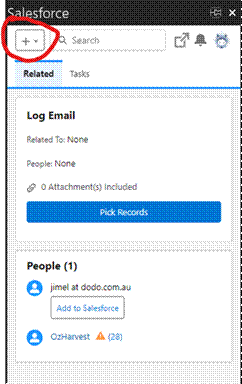
After that, you'll be brought to a section of the pane, where you must click on the (“+”) plus symbol to input related details.
3.
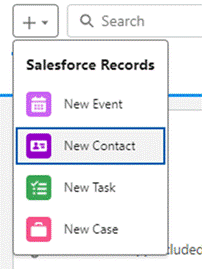
Clicking on the “+” will open a drop-down on the pane, so choose whatever pertains. For this example, we're looking to create a “New Contact”, so select this.
4.
Selecting “New Contact” will allow a form to create the contact to appear on the pane. Some areas will be pre-filled according to the sender's email, and the name associated. After doing so, press 'save', and the contact will be created on Salesforce (it's always good to check on Salesforce itself, to ensure that this has been successful).
Minimum requirement: if you know the postal address, please add this in. It's a necessary requirement – any way to contact our supporters is always of utmost importance.
Remember: Add as much information as possible, i.e., name, address, and email (of course). The more data we have, the better.